Microsoft Teams has become an essential tool for remote work, online meetings, and collaboration. However, one of the most common and frustrating issues users can face is the camera not working in Teams. In this article, we will guide you through the possible causes and solutions to fix your Teams camera not working issue.
Numerous factors can cause your camera to not work in Microsoft Teams, ranging from privacy settings and hardware issues to software conflicts. Understanding these factors will help you troubleshoot and resolve the problem with ease. By following the suggested steps, you can enhance the quality of your Microsoft Teams experience, ensuring clear communication.
Camera Not Working in Teams: Identifying the Problem

It can be quite frustrating when the camera not working in Teams issue arises, but don’t worry—we’ll guide you through some simple steps to identify the underlying problem.
First, determine if the issue is isolated to Microsoft Teams or if it affects your computer’s default camera app. Press the Windows key and type ‘Camera,’ and then click on the default Camera app that appears. If the Camera app shows a live feed from your camera, the issue likely lies within Teams’ source.
Now, check if any updates are available for Teams or your device. Outdated software can sometimes cause compatibility issues, leading to camera problems. Also, ensure your camera isn’t in use by another application, as this can prevent Teams from accessing its source.
Here are a few practical steps you can take to resolve Teams camera issues:
- Restart your PC or laptop.
- Now Restart Microsoft Teams.
- In case you have a USB camera, disconnect & reconnect it.
- Connect your camera with a different port to prevent a faulty USB port source.
Check Settings to Find Out Why Camera Not Working in Teams
When facing camera or microphone issues in Microsoft Teams, you must check your settings to troubleshoot the problem. In this section, we will cover inspecting device settings, understanding the causes, surveying webcam issues, and testing the microphone. So Here we go!
1. Inspecting Device Settings
To ensure your camera and microphone are correctly set up in Microsoft Teams, follow these steps:
- Open the Teams app.
- Click on your profile picture in the top-right corner.
- Select “Settings.”
- Click on “Devices.”
- Under “Camera” and “Microphone,” make sure the correct devices are selected.
2. Surveying Webcam Issues
To address webcam problems, check if your camera is working on other applications or websites. Additionally, ensure that:
- Other applications aren’t actively using the camera.
- Your camera is connected securely to your computer.
- You have the latest drivers installed for your camera.
3. Testing the Microphone
Finally, to test your microphone, follow these steps:
- Open the Teams app.
- Go to “Settings” and click on “Devices.”
- Under “Microphone,” select the correct device.
- Speak into the microphone and check if the audio level moves.
Troubleshooting Camera Not Working in Teams
Are you facing the issue of the camera not working in Teams? Don’t worry; we are here to help you. In this section, we will tell you the top 5 solutions for the camera not working in Teams. If you are already aware of the reason for this problem, you can try the respective solution; otherwise, you can try all the solutions one by one to fix this issue.
Solution 1: Restart Your PC
First, a simple yet effective solution is to restart your computer or laptop. A system restart can resolve many issues and might just fix your camera not working in Teams problem. Similarly, try restarting Microsoft Teams, as it could be a hiccup in the app, causing the camera to malfunction.
If you’re using a USB camera, disconnect and reconnect it to see if that resolves the issue. Alternatively, connect the camera through a different USB port to rule out a malfunctioning port.
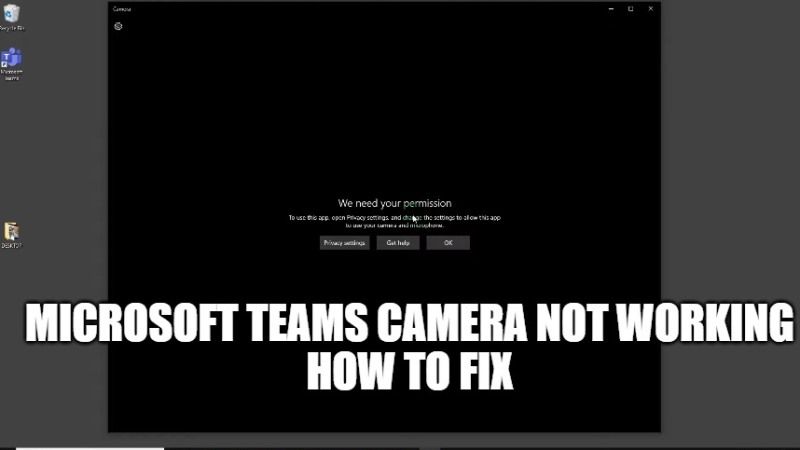
Next, ensure that Microsoft Teams has permission to access your camera. Navigate to Windows Settings, select ‘Privacy,’ then click on ‘Camera’ under ‘App permissions.’ Enable ‘Allow apps to access your camera’ and ‘Allow desktop apps to access your camera’ to grant Teams access.
If your camera is still not working, try the following steps:
- Check for updates for both your camera driver and Microsoft Teams.
- Confirm that your camera is not in use by another application.
- Make a test call to see if the issue persists.
- Troubleshoot camera issues in Windows 10 or macOS, depending on your system.
Remember, if you continue to face issues, don’t hesitate to consult the Microsoft Support site for more help. Moreover, if you are Mac user and facing issues with Microsoft Teams, then you can check out our article to find fixes for Microsoft Teams not working on Mac.
Solution 2: Review System Preferences
Before diving deep into troubleshooting your camera not working in Teams issue, it’s essential to check your system preferences to ensure that your camera is allowed to be accessed by the application. In this section, we will look into the necessary privacy and security settings adjustments.
To review your system preferences, follow these steps:
- Open System Preferences on your computer.
- Navigate to Security & Privacy settings.
- Click on the Privacy tab.
- Locate the Camera settings in the list on the left side.
- Make sure that Microsoft Teams is checked, granting access to your camera.
If you notice that Microsoft Teams is not listed, check your privacy settings within the application itself.
Another aspect to consider is ensuring that no other applications are accessing your camera simultaneously, as this may cause conflicts while using Microsoft Teams. Close any unnecessary applications and check your computer’s task manager to ensure that no background processes are using your camera.
Solution 3: Updating the Teams App
Keeping your Microsoft Teams app up to date is vital for ensuring its compatibility with your device’s camera. Updates often include bug fixes and new features that can help resolve camera issues you may be facing. Here are some simple steps to help you check for and apply updates to your Microsoft Teams app.
- Open Microsoft Teams on your device.
- Click on your profile picture in the upper-right corner of the app.
- Choose Settings from the dropdown menu.
- In the Settings menu, locate and click the Check for updates option. This will prompt the app to search for available updates.
- If an update is found, follow the on-screen instructions to install the latest version of Microsoft Teams.
Remember to regularly check for updates, as new improvements and fixes are continuously being released. With the application updated, you can confidently use Microsoft Teams with your camera for a seamless video-calling experience. Moreover, if you want to learn how to share screen on Teams, then go through our write-up.
Solution 4: Navigate Camera Access
Firstly, make sure you have granted camera access to Microsoft Teams. To do this, you could:
- Open Windows Settings and click on “Privacy.”
- Select “Camera” in the left sidebar.
- Ensure “Allow apps to access your camera” is enabled.
- Scroll down to find Microsoft Teams and check if the toggle is turned on.
Next, adjust your camera permissions from within Microsoft Teams:
- Launch Microsoft Teams and click on the three-dotted button in the top-right corner.
- Select “Settings” and then click on “Permissions”.
- Make sure “Camera” is set to “Allow” access.
Now, let’s ensure your security settings are not blocking camera access:
- Open your antivirus or security software.
- Look for any settings related to webcam security or privacy.
- Verify that your software is not blocking access to your camera while using Microsoft Teams.
Remember to also check for any physical issues, such as ensuring your camera lens is clean and facing the right direction. If you are using a USB camera, it’s a good idea to disconnect and reconnect it or try a different USB port.
Solution 5: Uninstalling and Reinstalling- The Ultimate Solution
If your Teams camera is not working, one possible solution is to uninstall and reinstall the Microsoft Teams application. This can resolve any software issues that may be causing your camera to malfunction. Follow these simple steps to uninstall and reinstall Microsoft Teams:
- Press Windows key + R to open the Run dialog box.
- Type appwiz.cpl & then Click Enter to open the Programs & Features option.
- Locate Microsoft Teams in the list, right-click, and select Uninstall. Follow the prompts to uninstall the application.
- When the uninstallation is done, restart your computer.
- Visit the Microsoft Teams download page to download the latest application version.
- Install Microsoft Teams by following the on-screen instructions.
- Launch the newly installed Microsoft Teams application and sign in with your credentials.
With Microsoft Teams reinstalled, check if your camera is working. If your camera is still not working, consider checking your camera settings within the app.
Frequently Asked Questions
Q1. What should I do if my camera isn’t working in Teams on a Mac?
Ensure that your Mac permissions are set correctly. Follow these steps:
- Open System Preferences on your Mac
- Click Security & Privacy
- Choose Privacy
- Select Camera
- Make sure that Microsoft Teams is checked
- Restart Microsoft Teams
If the problem persists, try unplugging and reconnecting the camera or updating your macOS software.
Q2. How can I resolve laptop camera issues in Teams?
Issues with camera connectivity can have many solutions. Here are some basic steps to address laptop camera problems:
- Ensure your camera is connected and enabled
- Update your camera drivers through Device Manager
- Make a test call within Microsoft Teams to check camera functionality
- Restart your laptop
- Try using a different USB port
Q3. How can I enable the camera on a Mac in Microsoft Teams?
To enable the camera on a Mac, follow these steps:
- Launch Microsoft Teams
- Click your profile picture at the top right corner
- Select Settings
- Click the Devices tab
- Underneath Camera, choose your preferred camera from the dropdown menu.
- Ensure Automatic is selected if you have multiple cameras
Remember to grant necessary camera permissions to Microsoft Teams in your Mac’s System Preferences.


