
In today’s interconnected world, the ability to access your work computer from anywhere has become a necessity. For Mac users leveraging Microsoft’s Remote Desktop, this is not just a possibility but a streamlined reality. Bridging two different operating systems, this tool allows for seamless connectivity and efficient remote work.
Microsoft Remote Desktop Mac allows you to connect to Azure Virtual Desktop, Windows 365, admin-provided virtual apps and desktops, or remote PCs seamlessly from your macOS device. Whether you’re a seasoned professional or new to remote connections, this guide will walk you through every step of utilizing Microsoft Remote Desktop on a Mac, ensuring a smooth and secure experience.
What is Microsoft Remote Desktop Mac?
Microsoft Remote Desktop Mac allows you to connect to Azure Virtual Desktop, Windows 365, admin-provided virtual apps and desktops, or remote PCs seamlessly from your macOS device. With this powerful tool at your fingertips, you can be productive and manage resources remotely, no matter where you are. As a Mac user, you can use the macOS client’s features to make your remote desktop experience smooth and efficient.
Setting up Microsoft Remote Desktop Mac is as simple as downloading the client from the Mac App Store and configuring your PC to accept remote connections. As you begin using Microsoft Remote Desktop for macOS, you’ll find that it offers a range of settings and features tailored to the macOS user experience. This includes general settings such as keyboard shortcuts, as well as client features specific to Azure Virtual Desktop. With a confident and knowledgeable approach, you can make the most out of this powerful tool and enhance your productivity.
Microsoft Remote Desktop Features
Microsoft Remote Desktop for Mac allows you to connect to Azure Virtual Desktop, Windows 365, admin-provided virtual apps, and desktops, as well as remote PCs easily. This enables you to stay productive regardless of your location. Here are some key features to explore when using this powerful tool.
1. Remote Desktop Client
Firstly, the Remote Desktop Client for macOS has many features that help you optimize your remote working experience. These features include multi-monitor support, scaling options, and input methods like touch and pen support for optimal functionality.
2. Azure Virtual Desktop
With Azure Virtual Desktop, you can access a virtual desktop infrastructure (VDI) from your Mac device. This powerful platform enables you to use remote apps, manage your user accounts, and customize your display resolution, ensuring a seamless and efficient working experience. Learn more about the Remote Desktop client for macOS when connecting to Azure Virtual Desktop to make the most of these features.
3. RemoteApp
Another helpful feature is RemoteApp, which offers access to individual remote applications instead of an entire remote desktop. You’ll be able to launch and use specific applications as if they were installed locally on your Mac, making it easier to access and work with critical tools without needing a whole virtual desktop.
Downloading and Installing Microsoft Remote Desktop Mac
In this section, you’ll learn how to download and install the Microsoft Remote Desktop client for your Mac. This software allows you to work remotely by connecting to your Windows PC or virtual desktop from your Mac device. To download and install the software, follow these steps:
- Open the Mac App Store on your computer.
- Search for “Microsoft Remote Desktop” in the search bar.
- Click on “Microsoft Remote Desktop” from the search results.
- Click the “Get” button, followed by the “Install” button, to initiate the download and installation process.
Once the application is installed, you may need to set up your PC to accept remote connections. This crucial step ensures that you can easily connect your Mac to your Windows PC. For a smooth remote connection experience, follow all necessary setup steps provided by your admin or the application instructions.
How To Use Microsoft Remote Desktop on Mac
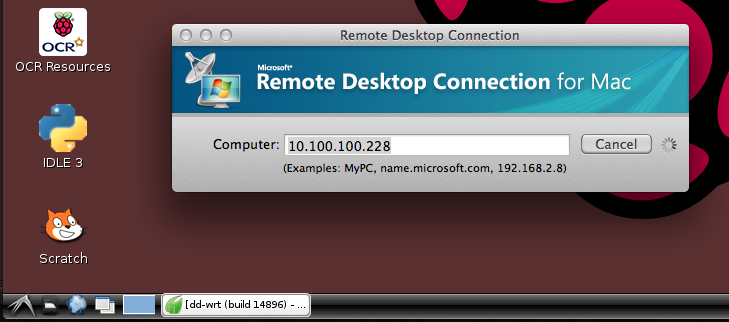
Microsoft Remote Desktop, your Mac, lets you access your Windows PC’s desktop and its resources. To get started, follow these steps.
- Open the Microsoft Remote Desktop app on your Mac.
- Click on the “+” button to add a new connection.
- Fill in the required details for the connection, including the PC’s name or IP address, username, and password for the user account you’ll use to sign in. Ensure the credentials match those of the user account on the Windows PC.
- Customize additional settings, such as the display resolution or audio settings, to suit your preferences.
- Click on the “Save” button to save the connection.
- Double-click on the connection you saved to initiate the remote desktop session. You will be prompted to enter your user account’s password.
- Once you have entered your password, click on “Sign in” to access your Windows PC’s desktop, apps, and resources.
What to do if Remote Desktop Connection for Mac is not working?

If you’re having trouble connecting, try these steps:
- Check Your Internet Connection: Ensure your Mac and Windows devices are connected to the internet without connectivity issues.
- Update the Microsoft Remote Desktop Mac App: Make sure you have the latest version of the app installed on your Mac.
- Enable remote connections on your PC: Follow the instructions provided by Microsoft to set up your PC to accept remote connections.
- Verify your login credentials: Double-check the username and password you’re using to ensure they’re correct.
Remote Desktop Settings and Personalization
Microsoft Remote Desktop for Mac lets you access and control Windows resources from your macOS device. To get started, you’ll need to configure a few settings to personalize your experience and make the most of this powerful tool. You can tailor your Microsoft Remote Desktop Mac experience by configuring these settings to suit your needs. Stay confident and efficient while accessing Windows resources and applications on your macOS device.
Resolution and Multiple Monitors
Microsoft Remote Desktop mac allows you to adjust the remote desktop’s resolution and work with multiple monitors. To do this:
- Open the Microsoft Remote Desktop app and select “Preferences.”
- Click on the “Resolution” tab to customize the screen size.
- Enable the “Use all monitors” option in the “Display” tab to use multiple monitors.
Managing Folders and Desktops
Microsoft Remote Desktop Mac also supports working with remote folders and desktops. To manage hidden folders:
- Go to “Preferences” in the app and click on the “Folders” tab.
- Click on the “+” button to add a new folder and specify its path on your Mac.
- Check the “Redirect” option to make the folder accessible in the remote session.
Add a new connection for each desktop using the steps outlined earlier to work with multiple remote desktops. Remember that managing multiple desktops may require powerful hardware, a strong internet connection, and sufficient resources on remote machines.
Frequently Asked Questions
Q1. How do I set up Microsoft Remote Desktop on a Mac?
- First, configure your Windows PC to allow remote connections. Go to System Properties > Remote tab and enable remote connections.
- Download and install the Microsoft Remote Desktop app on your Mac.
- Launch the app and click the “Add PC” or “+” button.
- Enter the PC name or IP address, and configure other settings.
- Click “Add,” and your Windows PC should now appear in the list of available connections.
Q2. How can I troubleshoot connection issues with Microsoft Remote Desktop on Mac?
If you’re having trouble connecting, try these steps:
- Verify that the Windows PC is configured to allow remote connections.
- Check your network connection and ensure both devices are on the same network.
- Ensure you have entered the correct PC name or IP address in the Microsoft Remote Desktop app.
- Restart both your Mac and Windows PC.
- If issues persist, check the Remote Desktop clients FAQ for additional help.
Q3. What are the best display settings for Microsoft Remote Desktop on a Mac?
To optimize display settings for the best experience:
- Launch the Microsoft Remote Desktop app on your Mac.
- Select the connection you want to configure, then click “Edit”.
- Go to the “Display” tab.
- Choose your desired resolution and scaling options.
- Enable “Use all monitors” if you have multiple displays, and select the “Optimize for Retina display” option if using a Retina display.
Q4. How do I export connections in Microsoft Remote Desktop Mac?
- Open the Microsoft Remote Desktop app on your Mac.
- Click “Connections” in the menu bar, then select “Export.”
- Choose a location to save the exported file, and click “Save.”
Conclusion
In summary, downloading and installing Microsoft Remote Desktop Mac is a straightforward process that involves searching for the application in the Mac App Store, clicking on the “Get” and “Install” buttons, and setting up your PC for remote connections. With these steps completed, you’ll be well-equipped to work remotely and access your Windows PC from your Mac device in a seamless manner.


