NoMachine is a versatile remote access platform that allows users to connect to any computer remotely with impressive speed and high-quality performance. Thanks to its innovative NX technology, it provides a smooth and efficient remote desktop experience, making it an ideal choice for users looking to access their computer from anywhere in the world.
With No Machine, you can achieve hassle-free remote control of your computer, regardless of the distance. Its enterprise-class management tools and award-winning performance make it a complete remote access and hosted desktop solution suitable for any individual or business. If you’re seeking a free, reliable, and efficient method to access your computer remotely, NoMachine could be the perfect choice for you.
Understanding No Machine
NoMachine is a powerful remote desktop software that allows you to access and control your computers and devices from anywhere securely. With an easy-to-use interface, NoMachine streamlines remote access and ensures all your files, videos, audio, and documents are under your control.
Some key features of NoMachine include:
- Fast and secure connection: NoMachine uses advanced compression techniques and encryption protocols to make your remote connection fast and secure.
- Cross-platform compatibility: NoMachine is available for Windows, Mac, Linux, and mobile devices so that you can access your computers and devices regardless of their operating system.
- File transfer and synchronization: With NoMachine, you can quickly transfer files between your local and remote devices and keep them in sync.
- Remote printing: You can print documents from your remote computer to your local printer without hassle.
Installing No Machine
NoMachine is compatible with various operating systems, including Windows, Mac, and Linux. In this section, we will guide you through the installation process for each platform.
For Windows Users
- Visit the NoMachine website and download the appropriate version for your Windows system.
- Double-click the downloaded file to start the installation process.
- Follow the on-screen instructions, accepting the default settings or customizing them as needed.
- Once the installation is complete, NoMachine will appear in your start menu. You can now launch the application and set up a connection.
For Mac Users
- Head over to the NoMachine website and select the version for your Mac.
- Once the file is downloaded, open the .dmg file.
- Drag the NoMachine application icon to the Applications folder, as instructed by the on-screen guide.
- You can now find NoMachine in your Applications folder and begin setting up a connection.
For Linux Users
The installation process on Linux depends on the package manager your distribution uses. Here are instructions for RPM, DEB, and TAR.GZ packages.
RPM Packages:
- Download the RPM package from the NoMachine website.
- Open a terminal window and navigate to the folder where the RPM file has been downloaded.
- Run the following command to install NoMachine: sudo rpm -i NoMachine-<version>.rpm
- NoMachine should now be installed on your system, and you can start configuring your connections.
DEB Packages:
- Download the DEB package from the NoMachine website.
- Open a terminal window and navigate to the folder where the DEB file has been downloaded.
- Run the following command to install NoMachine: sudo dpkg -i NoMachine-<version>.deb
- You can now launch NoMachine from your applications menu and begin setting up connections.
TAR.GZ Packages:
- Download the TAR.GZ package from the NoMachine website.
- Extract the package to a folder on your system.
- Open a terminal window and navigate to the extracted folder.
- Run the following command to install NoMachine: sudo ./install.sh
- Once installed, NoMachine can be launched from your applications menu, and you can start creating connections with ease.
Setting up Remote Connection
NoMachine enables you to access and control another computer over the internet using just a browser. In this section, we will guide you through setting up a remote connection with NoMachine in a simple and straightforward manner.
First, you need to download and install No Machine on both the computer you want to access (the remote computer) and the one you want to connect from (the local computer).
Once installed on both computers, follow these steps to establish a remote connection:
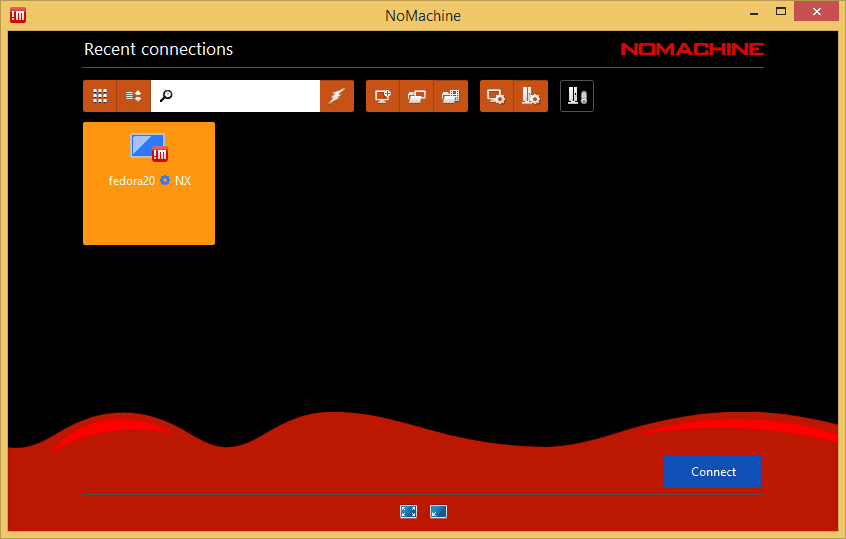
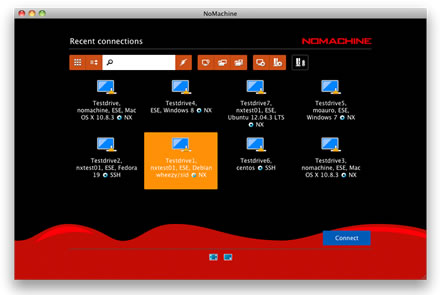
- Open NoMachine on the local computer from the Programs/Applications menu.
- This will show you a list of available remote computers to connect to. If the desired remote computer is not listed, click on “Add” to enter the remote computer’s IP address or hostname manually.
- Select the remote computer you want to connect to, and click “Connect“.
- You will be prompted to enter the credentials for an account on the remote computer. If you’re not sure about the credentials, check with the remote computer’s administrator.
- After entering the credentials, click “Login” to establish the remote connection.
Now you are in control of the remote computer using NoMachine. You can perform various tasks, such as accessing files and applications as if you were sitting in front of a remote computer.
Securing Your Connection
No Machine offers various features to ensure the security of your remote access, making your connection safe from threats and malicious attacks. In this section, we will explore some steps you can take to create a more secure connection.
To start with, No Machine supports SSL encryption to protect data transferred between your computer and the remote machine. This security measure significantly reduces the risk of eavesdropping or interception by unauthorized users.
Next, you may want to consider using key-based authentication when connecting to a remote machine using the NX protocol. NoMachine allows you to set up a key exchange, which provides an extra layer of protection against unauthorized access. Moreover, you can also use a VPN to secure your connection.
When sharing your desktop with guests, NoMachine provides you with control over who is allowed to connect to your machine. You can choose to accept or refuse connection requests on an individual basis. To enable guest desktop sharing, open the NoMachine UI, go to Settings -> Server -> Security, and check the appropriate option.
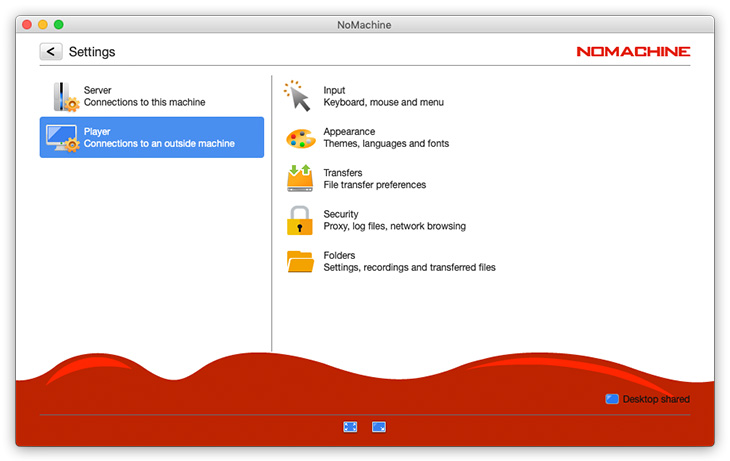
If you need to configure proxy settings manually, follow these simple steps:
- Launch the NoMachine UI and access Settings -> Player -> Security.
- Select ‘Use a proxy for the network connection’ and click on Modify.
- In the panel, check the option ‘Manual proxy configuration’, and specify the address IP of the proxy and the listening port in the provided fields.
Pros and Cons of No Machine
Now that you have all the major information about NoMachine, in this section, we will tell you about the pros and cons of this platform.
Pros:
- High-quality video and audio streaming.
- Multi-platform support (Windows, macOS, Linux, etc.).
- User-friendly interface.
- Offers both free and paid versions.
- Low latency performance.
Cons:
- Might require some configuration for optimal performance.
- Some features locked behind the paywall.
- Requires a stable internet connection.
- May consume significant bandwidth on high-quality settings.
- Less popular than some competing remote access tools.
Frequently Asked Questions
Q1. How to set up NoMachine on Windows 10?
- Download the NoMachine installer for Windows from the official website.
- Run the installer and follow the installation wizard’s instructions.
- Launch NoMachine on your computer. Once opened, you’ll see the main interface with available connections.
- To create a new connection, click “New” and input the required details such as the remote computer’s hostname or IP address.
- Click “Connect” and enter your credentials for the remote computer (if prompted). You’ll now have access to the remote desktop.
Q2. Is there an open-source alternative to NoMachine?
Yes, there are several open-source alternatives to NoMachine available for remote desktop access. One of the popular choices is TightVNC, which is available for both Windows and Linux systems. Another option is Remmina, which is mostly used on Linux platforms but also supports Windows and macOS through its plugins.
Q3. How does NoMachine perform on iOS devices?
NoMachine provides an iOS app that allows you to access your remote desktop from your iPhone or iPad easily. The performance on iOS devices is generally smooth, as NoMachine uses advanced compression technology to minimize latency and optimize bandwidth usage. The app supports touch and gestures, making it user-friendly and suitable for mobile users.
Q4. How does NoMachine compare to VNC?
NoMachine and VNC are both remote desktop solutions, but they differ in features and performance. NoMachine offers advanced features like multi-monitor support, hardware-accelerated rendering, and file transfer capabilities, while VNC is more focused on basic remote access.
In terms of performance, No Machine is often considered faster and more efficient than VNC, as it uses H.264 video encoding and compression techniques to lower latency and improve responsiveness. Moreover, if you are looking for a comparison between VNC and TeamViewer, you can go through our article.
